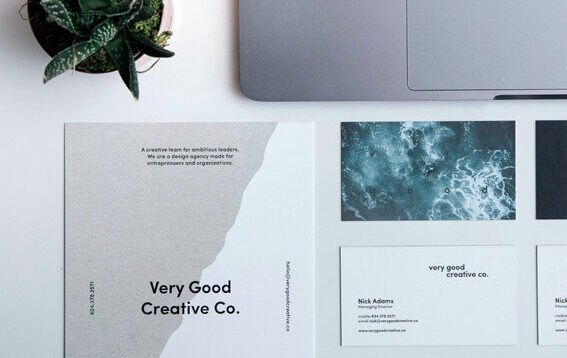
Business cards are often the first impression you make on potential clients or employers. A well-designed business card communicates professionalism and helps establish your brand identity. However, before printing your business cards, it’s essential to set them up correctly in your design software to ensure they turn out exactly as you want them to. This guide will walk you through the steps to set up your business card for print.
1. Choose the Right Design Software
Before diving into the dimensions and layout, you’ll need to pick the right design software. Some of the most popular options for designing business cards include:
- Adobe Illustrator: Ideal for professional designers who want complete control over their design.
- InDesign: Perfect for more complex multi-page documents, but also great for print materials like business cards.
- Canva: A beginner-friendly tool with ready-to-use templates. If you think you can set it up yourself but you don’t have any design software mentioned above, Canva is a great place to start.
2. Set the Document Dimensions (9cm x 5.5cm)
Once you’ve selected which option you’re are going to use to set up your business card, the next step is setting up the page size with the correct dimensions. Here’s how to do it:
- Open your design software and create a new document.
- Set the size to 9cm x 5.5cm (or 90mm x 55mm).
- Set the resolution to 300 DPI (dots per inch). This is the standard print resolution for high-quality prints.
- If you’re using Canva, you can skip the resolution set up part but ensure you download the file with the PDF Print option and tick the add crops and bleeds section before downloading.
3. Add Bleed (3mm on all sides)
Bleed is the area that extends beyond your document’s actual size. This ensures that when your business cards are cut after printing, there will be no white borders. For professional-quality printing, a 3mm bleed around all edges is standard.
- Set a 3mm bleed on all sides of the business card. In most design software, this is an option when setting up the document. In Canva, as long as your background extends beyond the edges of the page size then it should have bleed when you select the ‘Add crops and bleeds’ option when downloading.
- Extend the background colours, images, and designs into the bleed area. This is especially important if your design has a solid colour or image that runs to the edges.
Tip: Don’t place any important text or logos within the bleed area. Keep your content at least 3mm away from the edges of the card so we have plenty of room to cut without cutting into anything critical. For further instructions on this you can read our post What are Crops and Bleeds?
4. Design Your Business Card Layout
Now comes the fun part: designing your business card! Here are a few tips to help make sure your design looks polished:
- Keep your branding consistent: Use your company colours, logo, and fonts to maintain brand consistency. Make sure everything is aligned with your visual identity.
- Use legible fonts and sizes: Business cards should be easy to read. Opt for clean, professional fonts, and ensure they’re large enough to be legible at a small size. One of our biggest issues with business cards is when someone has designed it to look good on the screen but hasn’t taken into account how that will print at such a small scale – fonts should be at least 8pt in size for it to be easily readable.
- Include essential information: Typically, your business card should have:
- Your name
- Job title or role
- Phone number
- Email address
- Website
- Social media handles (optional)
- Company logo
- Use a minimalist approach: Business cards should not be overloaded with information. A simple, clean design is often more effective than something crowded with fancy text and graphics.
6. Check Colour Mode and Export Settings
One of the most common mistakes when designing for print is working in the wrong colour mode.
- Use CMYK colour mode instead of RGB. The CMYK colour model (Cyan, Magenta, Yellow, Black) is used for print, whereas RGB (Red, Green, Blue) is for screens. Canva only allows downloading in RGB colour when using the free option so be aware that colours may change.
Export Settings:
- Export your final design to a PDF file as a single card. We will impose (lay up multiple cards per sheet) at our end.
- Make sure to include crop marks and bleed in your exported file.
7. Proof Your Business Card
Before sending your card off for print, review your design carefully. Check for:
- Spelling or grammatical errors: It’s easy to overlook these, but a mistake could make your business card look unprofessional. This includes checking phone numbers are correct!
- Alignment and spacing: Ensure your text is well-spaced and aligned with the overall layout.
- Image quality: Make sure all images and logos are at least 300 DPI to avoid pixelation when printed.
- Bleed areas: Double-check that your background extends into the bleed and that no important content is within the 3mm bleed area.
8. Send it to us
Once you have your business card ready to go, send it through to us for printing at print@riegers.co.nz
A couple of things to think about before sending:
- What card stock do you want? We typically print on a 350gsm gloss card or a 350gsm satin card (this one isn’t what we would call a matte card stock but is a smoother finish that is less glossy than the other option).
- How many do you want? With business cards there is typically a file set up fee and a cutting fee that remains pretty consistent no matter how many you get, then you have the cost of the printing and card stock. It always pays to get a reasonable number of cards (at least 100) from a cost effective viewpoint.
- Do you want to see a sample? Sometimes it’s worth checking one before running with a large quantity if you’re not sure about colours or fonts/sizes and how they will display. We’ll let you know if we see anything glaringly obvious though so this isn’t a necessity.

